 Almost anything grows in Iowa, especially tomatoes. You can buy seedlings, which are sold in every nursery, or you can start your own. When I first moved to Iowa in the nineties, few but the basic varieties were available, but the past decade or so has seen the appearance of lots of heirloom tomatoes in different shapes, sizes, and colors at farmers markets and nurseries almost everywhere, so I’ve stopped starting seedlings. (It’s a pretty labor-intensive process, and I miss it a little–there is something miraculous about seeing those first sprouts poking out of the soil in a seed-starting set-up in the dead of winter.) I’ve been growing tomatoes for a couple of decades, and have learned through trial and error some pretty good methods (see Too Many Tomatoes). My philosophy in the garden is to minimize maintenance, so I don’t have to worry about the garden when I’m gone, and to maximize yield, because I love to have more than enough to cook and share. A huge part of maintenance in the rich black earth of Iowa involves controlling weeds, which are the bane of every gardener. It’s by far the absolute worst job in the garden, nobody likes to do it, and it can be pretty hard to do, especially when they’ve had a couple weeks to get established. The best way I’ve found is organic, fairly inexpensive, adds rich organic matter to the soil over time, and really keeps the weeds down. It takes a bit of effort at the beginning of the summer, but it is totally worth it, because once you have the tomatoes in, all you need to do is water if it’s dry, tend the vines when they get unruly (they will), and harvest at the end of the summer (this is actually the biggest and most important job). If you follow the steps below, you should have great success with tomatoes.The same method, more or less, works well with peppers and eggplants; watch for another post on growing them.
Step 1: Till the soil/Clear the weeds
This basically involves clearing a patch of ground of all growth–grass, weeds, etc. If you’re breaking fresh ground in a lawn, it’s probably easier to hire someone to till with a tractor if it’s a large section, or a hand-held tiller if it’s small. (You can also use methods like covering the grass in the fall with layers of mulch–the so-called lasagna method, but that takes a lot of advance planning.) If you are weeding out an already used, weedy garden, it is essential that you get all the weeds out. This means not just the green tops, but the root systems underground. If you don’t get the roots out, they’ll grow right back, even more robust, and you’ll be doing the same job again and again. And your plants will have competition for the soil, which will mean smaller yields. There are a lot of tools out there; I use a couple of hand-held hoes, but you should use what works best for you. If the ground is compacted, it’s good to use a shovel and loosen the weeds and soil. Work systematically, and remove the entire weed, leaves,stems, and roots. And be careful as you go: it’s easy to bury weeds as you move through the garden. Missed weeds are future weeds This is. easily the most important step, and if you take the time now, it will pay off later. You should try to start your garden as early as possible–to give your plants plenty of time to grow, and also to catch the weeds at their weakest (and the mulching in step 3 will control seeds in the soil from sprouting).
Step 2: Plant your tomatoes
Once you have your ground tilled and weed-free, it’s time to plant (and this should happen as soon as possible after Step 1). A word on spacing: tomatoes need at least 4 feet or more between plants. Any closer and they’ll grow into a green mass that will make it hard to pick the tomatoes when they’re ripe. And the yield will be less, since there is more competition for the soil. I use the mulch I’m using as a kind of guide–a newspaper, in my case. Dig the holes for the tomatoes fairly deep–it’s a good idea to bury some of the stem, so the plant can develop a strong root system. Now’s a good time to use an organic fertilizer if you use one–but the soil is so rich in Iowa, that often this isn’t essential.
Step 3: Set down mulch
For lining the soil, I use newspapers; the New York Times is best, since there are no glossy inserts, but any newspaper will do. (No printers use lead- or oil-based inks anymore, but opt for cheaper soy-based ones, so that’s not a cause for concern). I put straw over the newspaper, and most lumberyards or farm stores will have straw, at about 5$ a bale (which will cover a space about 5′ x 5′, give or take). Lay the newspaper down around the plants; you can put the edges close to the base of the stems; the water will get through, and the newspaper will control the weeds. Then put a layer of straw down, about 2 inches thick. If it’s windy, you may need to do this piecemeal, but if it’s a still day, you can put down all of the newspaper at once, and then put the straw down. Apart from keeping the weeds under control, the mulch holds down moisture, so if you need to leave town for a few days or a week or two, your plants should be fine.
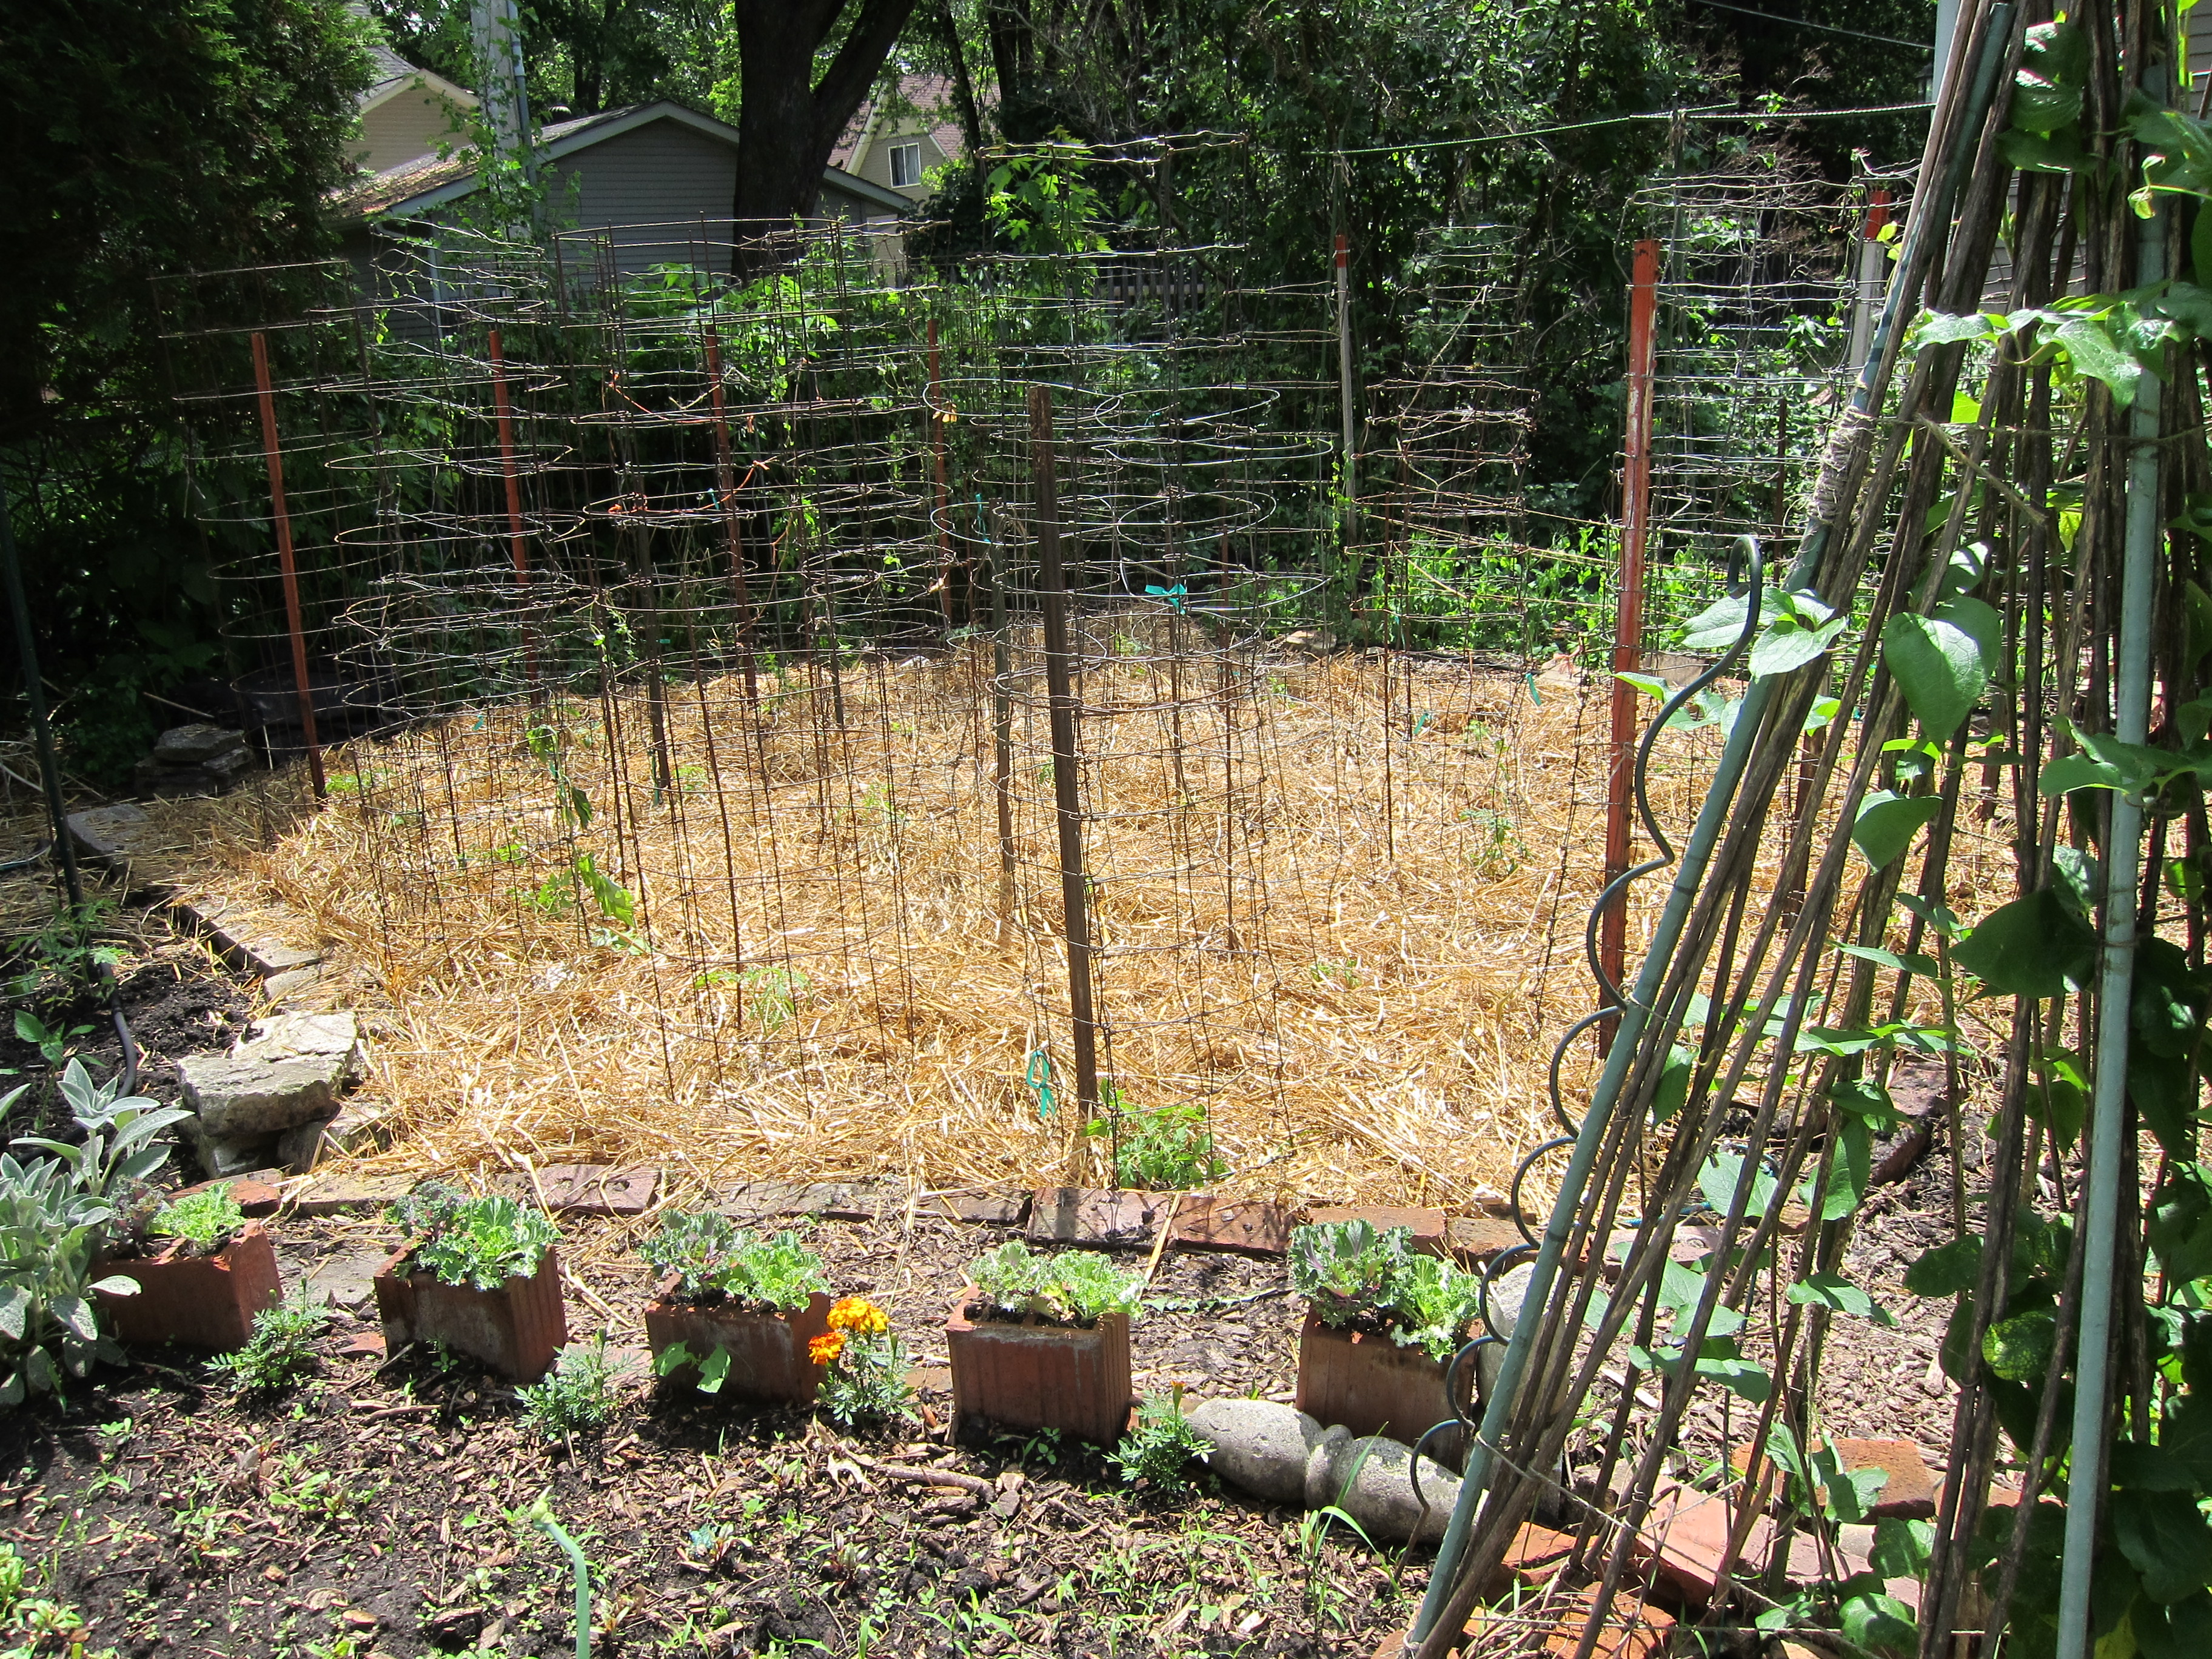
Step 4: Put in supports
I usually grow Indeterminate tomato plants; they grow as vines, and produce tomatoes gradually, as opposed to determinate plants, which grow as a bush, and produce tomatoes all in one bunch. (Most plants available in nurseries are indeterminate.) An indeterminate tomato will grow up to about 6 or 7 feet, and thrives with strong support. Without it, tomatoes grow in a sprawl on the ground, and it’s hard to find the tomatoes (and they will be more prone to diseases and bugs). A word on tomato cages: the three-ring wire cages you find labeled as tomato cages in most garden centers are, in a word, NOT tomato cages. They are great for supporting eggplants and peppers, but they are terrible for tomatoes. They work for about a month, and then the tomato plant grows up and over the tops, and down to the ground, unless you rig up more supports–but that makes for extra work. The larger, four-ring cages are better, but they’re also more expensive. I use old hog confinement wire, which lies around on farms all over Iowa. It takes a lot of work to find, haul, cut up, and bend into cages, but they last forever, and work the best. If this isn’t possible, then the largest cages you can find at garden centers will do. If I’m using store-bought cages, I’ll usually put in a six foot post or pole (the green ones available at larger garden centers work well), and tie the cage to the pole. You can tie the tomatoes to this post as they outgrow the top of the cages. The cages hold down the straw and newspaper and protect the young plants, so this step should be done at the same time as Step 3.
Step 5: Water/Maintain
Now all you really need to do is water, if it’s dry, and maintain the vines as they grow in. I’ve started to put in a soak hose prior to Step 3, which cuts down on time if you’re watering a lot of plants, but if you have just a few plants, watering by hand shouldn’t be too hard. When you do water, water at the base of the plant, and avoid getting any of the leaves wet. Tomato plants don’t tolerate too much moisture on their foliage, and water will also spread diseases. Tomatoes often develop wilts and other diseases, and these are hard to control–but if your plants start out fairly healthy, and become well-established, even if your plants start to wilt, they will still produce plenty of tomatoes before the plant dies.
Step 6: Harvest
This is one of the most labor-consuming parts of growing tomatoes, and it’s often one that gets neglected, especially if there is a good harvest. But it’s also a labor of love, if you like tomatoes. You should try to pick tomatoes just as they ripen, or slightly before. Take care to keep the skins from getting pierced or cracked, because they will start to rot pretty quickly if the skin is not intact. If I’m harvesting a lot or tomatoes, I’ll pick off the green stem end, since they can poke holes in other tomatoes. I keep them on plastic trays in a single layer, and use them as they ripen. Any blemished tomatoes can be used right away, either fresh or in a sauce, or thrown into a ziploc bag and then into the freezer.
Step 7: Store
There’s a lot of different ways to store tomatoes. Canning is an old school method, and pretty labor-intensive, and I’ve never really managed to put that together. Freezing works well, and is pretty fast, especially if you skip what I used to think was a crucial first step: blanching in boiling water and peeling. It’s much easier and probably more efficient to simply put washed, stemmed tomatoes into ziploc bags, and into the freezer. The only downside of this method is that is takes up a lot or freezer space. If you don’t have the latter, then blanching and peeling will allow you to fit more tomatoes into the bag. You can also cook peeled, chopped tomatoes down into sauce for freezing. I use a version of this process for smaller plum and cherry tomatoes, which can be hard to manage when there are a lot them: I fill a crockpot with tomatoes, throw in a cup of water, and put them on simmer in the morning. When they are completely broken down and cooked, I use a handheld blender to puree them, and then strain them into a heavy gauge sauce pan, and simmer on very, very low until until they are reduced into a thick sauce. I usually add a teaspoon or two of salt, and one of sugar.
